Ahhhh, the perfect blowout. How is it you never really look as put together as you do when you leave the salon after a professional blow dry? Is there magic to hair care and achieving the perfect blowout or is it possible, just possible to do it yourself? Actually, it is as long as you follow the right steps.
A good blowout can last several days. Once you learn how to do it the right way and you take your time, you should be able to keep the look for several days. If you find hair is getting greasy, a bit of baby powder along the crown not only soaks up oils, it adds body.
Difficulty: Average-Hard
Time Required: 15-30 minutes for short hair, 45 min plus for longer or thicker hair
Here's How:
1.Start with freshly-washed hair.
If you have dry hair, condition in the shower. If you have fine hair, condition only the ends. Blot hair -- never rub -- with a towel to get rid of excess moisture. You can't do a blowout with super wet hair or it will take forever.
2.Apply product to towel-dried hair.
A good styling product is key to the perfect blowout. It adds body to fine, limp hair, while women with thick, curly hair need to keep the frizzies at bay. The secret is to coat every strand of hair with product.
If you have curly or dry hair, work in be Clarked "straighten up" and "shine envy". Start by coating the ends, working your way up the hair shaft. Finish by combing the product through hair.
If you have flat, limp hair, spritz be Clarked "ego boost" volumizing spray to maximize your haircut volume.
3.Break out the blowdryer.
If hair is still pretty wet, use a dryer to remove excess moisture before you start the blowdry or let hair airdry for a few minutes.
4.Separate hair into sections.
Divide combed hair into sections and secure with clips or ponytail holders. I find winding hair into mini buns -- two in the back and one on each side -- works best. If you have super thick or heavy hair, try dividing each of your sections. One above the other helps manage the blowout. Leave out a section to start with.
5.Start with your fingers.
Stylists know the secret to the perfect blowout is to start with your fingers. Pull your fingers through hair starting at the roots. Pull hair out a few inches and hold it while you use the dryer to shoot air at the crown on down. We call this powerdrying. It will save your arms in the long run. We don't recomend this with very curly hair though, it may start to frizz before you get to the round brush part.
6.Move on the round brush.
Now that your roots are dry, it's time to move on to a round-barreled brush, we preser a ceramic ion brush. Pull the brush through hair as you blowdry, pointing the nozzle downward onto hair (this helps with frizz).
7.Pull hair super taut as you dry.
As you pull the brush through hair, follow the brush with the dryer. Imagine there's a point six inches in front of your nose. Stretch the hair toward that point as you dry. It sounds crazy, but when you're done, the tips won't flip under or up -- they'll just sort of fan out over your shoulders.
8.Lock in style with the "cool button."
The last step for each section is to pull hair taut with the brush and blast it with cool air from your dryer. You can also each dried section up in a Velcro roller.
9.Continue through all sections until hair is dry.
10.Finish off with a be Clarked "shine envy".
Weigh down random frizzy bits with a shine serum or balm. Skip this step if you have limp, oily hair.
Don't want to be bothered with the trouble of doing this at home? We have a great deal this week for blow outs. Purchase 4 blow out styles with Brenda for just $100.00 and have great hair without the fuss. Must be purchased by Friday June 15.

Tuesday, June 12, 2012

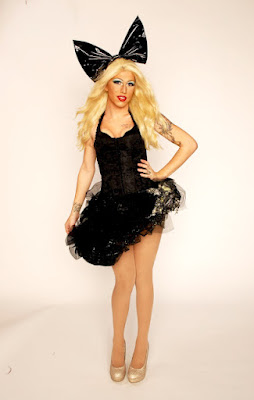
Miss Bobbi Pinn performance for Avon Walk for Breast Cancer
Come on out to WPLJ's "The Main Drag" Hosted by Vivian Lee on June 14th for a night of fun & girl power as we celebrate LIFE! Plus see Jeffrey from Clark Russell the salon as the fabulous Miss Bobbi Pinn, and help raise money for Avon Walk for Breast Cancer
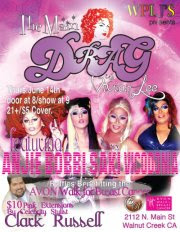
Celebrity Stylist Clark Russell & his team will be in the house doing $10 pink extensions will all proceeds going to the Avon Walk for Breast Cancer so get there early to get your pink on! PLUS Bobbi Pinn will be doing some fabulous raffles throughout the night with great prizes also all going towards the walk!
Aside from our regular cast featuring Vivian, Bobbi, Anjie & Saki, we will be joined by our extra special guest Vicodonia, a show not to be missed!
WPLJ's - 2112 N. Main St, Walnut Creek CA
21+ $5 cover
Door at 8pm, Show at 9.

Celebrity Stylist Clark Russell & his team will be in the house doing $10 pink extensions will all proceeds going to the Avon Walk for Breast Cancer so get there early to get your pink on! PLUS Bobbi Pinn will be doing some fabulous raffles throughout the night with great prizes also all going towards the walk!
Aside from our regular cast featuring Vivian, Bobbi, Anjie & Saki, we will be joined by our extra special guest Vicodonia, a show not to be missed!
WPLJ's - 2112 N. Main St, Walnut Creek CA
21+ $5 cover
Door at 8pm, Show at 9.

Dad's Haircut... Top 12 looks and the Deal of the Week!
Men's Hairstyles: 2012 (according to Ask Men Magazine)
Double Slick
Classic:
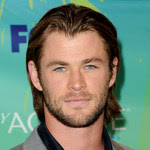
In some form or another, a sleek slick has regularly appeared in men’s hairstyles over the past few years, largely due to the popularity of period dramas such as Mad Men and Boardwalk Empire. This year, the twist is two slicks instead of one. To wear the double slick in a more classic way, like actor Chris Hemsworth, you’ll need to grow your hair to medium length. Next, create a center part close to your forehead using your fingers, but don’t be too precise about it -- you’re going for a wavy look that combines refinement with roguishness. Lastly, use a minimal amount of gel or styling cream and a wide-toothed comb to gently maneuver your front hair slightly upward and toward the side.
Trendy Take:

To adopt 2012’s double slick in a less traditional way, check out the style sported by actor Michael Pitt. Reminiscent of the sharp hairstyles favored by men in the early 20th century, this cut is characterized by hair that is significantly longer on the top than it is on the sides. To get this style, visit your barber and ask him to trim the hair on the crown of your head to a medium length and to remove weight from the sides of your head -- the more daring you are, the shorter the bottom layers can go. At home, comb all of your hair back with a touch of styling product and run your fingers through your hair to achieve the double slick. This hairstyle works best with straight hair.
Indie-Rock Front
Classic:

The cool, mod-ish look that has become synonymous with indie rock was highly influential in determining men’s hairstyles for 2012. Whether you love this genre or your musical tastes lie elsewhere, this hairstyle is incredibly easy to wear. A classic version of this cut, like the one worn by Lionel Messi, simply involves asking your barber to snip some piecey layers into your hair and then brushing the front forward before you leave for work.
Trendy Take:
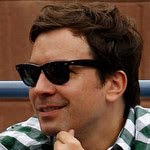
Given that 2012’s indie rock hairstyle is largely about a full head of hair that women will want to run their hands through, your focus should be on choosing products that will help you get strong, shiny strands. For a hipper variant of the indie front, add a volumizing mousse to your hair-care routine to get some lift like Jimmy Fallon's, and then finger-style your hair for a purposefully undone look. This style lends itself beautifully to naturally wavy hair.
Short Buzz
Classic:

Last year, an ultra-defined buzz cut was the go-to hairstyle for black men. This year, the square-shaped cut remains the leading style for a good reason: It makes any man’s face appear more masculine, it’s easy to maintain and it’s sharp and sexy at the same time. Cam Newton and Drake have both recently been photographed sporting classic examples of this cut.
Trendy Take:
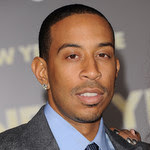
In 2011, the unique way to wear this cut was by incorporating asymmetrical designs. For 2012, however, trade the fancy hairstyling that no one will see unless they’ve got a bird's-eye view of your scalp in favor of stylish sides that will get everyone’s attention. You’ll notice Ludacris’ style, for instance, deviates from the perfectly square. Alternatively, shearing off most of your locks like Don Lemon is another fashion-forward way to wear this style.
Rockabilly
Classic:

Originally pioneered by musicians like Johnny Cash and Elvis, the ’50s pompadour is in the midst of a revival. As long as you go with a toned-down pomp, as seen in the Dolce & Gabbanna and Louis Vuitton Spring/Summer 2012 runway shows, this hairstyle works even in a conservative environment. Achieve a low-key pompadour by using mousse to coax only your front strands into standing up, then brush them slightly backward and to the side.
Trendy Take:

If you are employed in a creative field or it’s your day off from your suit-and-tie job, consider rocking a refined quiff, which was also showcased in a variety of major 2012 shows. Begin by working mousse throughout your entire head, and then have fun playing around. Just remember to keep the biggest lift in the front of your head and finish with a misting of hairspray to ensure your style stays put.
Messy curls
Classic:

It’s a fact that curly hair tends to have a mind of its own. The trick to working with this hair type is to get a great cut and then let your curls do their thing. In 2012, that means having your hair cut much shorter on the sides than on your crown. With buzz-cut sides and a peaked front, Oscar Pistorius’ ‘do is the gold standard for a classy, office-appropriate look. To keep everything polished, remember to use an anti-frizz product to control fly-aways.
Trendy Take:

Curly haired guys with an artsy side and a devil-may-care attitude will favor James Franco’s interpretation of this hairstyle, in which locks are still longer on top than on the sides but are overall longer everywhere. Another notable feature of this easygoing style is that while it may appear messy, curls are actually well defined, so you’ll need to throw a curl-controlling cream or shampoo into your grooming routine.
Chin-Length Layers
Classic:
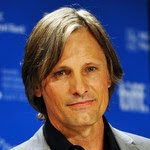
Surf culture past and present has been a major theme in fashion as of late, with models being sent down runways sporting rash guards with blazers and long, natural hair. For a sleek option, model your hairstyle on Viggo Mortensen’s gradually layered locks. As you can see, medium to long layers can work well on straight hair regardless of your age, but what really counts here is a top-notch haircut that will air dry to perfection.
Trendy Take:
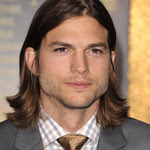
To wear chin-length layers in a very of-the-moment way, see Ashton Kutcher’s fresh take on the ’90s grunge-surfer look. The actor’s locks are only lightly layered and his part has a somewhat haphazard appearance that’s straight out of the '1990s. What keeps Kutcher’s hairstyle fresh, however, is its healthy (not greasy) shine. If you opt for this natural style, too, avoid scraggly locks by not making the mistake of skipping haircuts.
Short And Even
Classic:
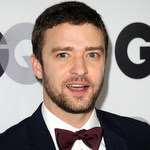
An all-over short cut of a uniform length, as recently seen on Justin Timberlake, will emerge as one of 2012's favorite men’s hairstyles. In addition to being a wash-and-go style that’s ideal for active dudes, this look exudes clean-cut American charm that will pair well with the minimalist ensembles you’ll be seeing in stores throughout 2012.
Trendy Take:
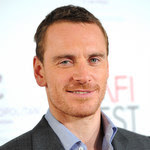
Take the good-boy edge off this cut, as Michael Fassbender has done, by leaving your front just a little longer than the rest of your hair and using a smidge of wax to get a piece-y effect. This style is particularly recommended for men in the early stages of hair loss. Also, if you’ve got a rounder face or soft facial features, consider growing some scruffy facial hair to bring a strong, masculine vibe to this style.
Get the perfect Fathers Day Gift for your Dad by purchasing a Father's Day Haircut Deal with Jeffrey at Clark Russell the salon! For just $100.00 you get 4 haircuts with Jeffrey for the Fashionable Dad in your life! Must be purchased by Friday June 15th!
Double Slick
Classic:

In some form or another, a sleek slick has regularly appeared in men’s hairstyles over the past few years, largely due to the popularity of period dramas such as Mad Men and Boardwalk Empire. This year, the twist is two slicks instead of one. To wear the double slick in a more classic way, like actor Chris Hemsworth, you’ll need to grow your hair to medium length. Next, create a center part close to your forehead using your fingers, but don’t be too precise about it -- you’re going for a wavy look that combines refinement with roguishness. Lastly, use a minimal amount of gel or styling cream and a wide-toothed comb to gently maneuver your front hair slightly upward and toward the side.
Trendy Take:

To adopt 2012’s double slick in a less traditional way, check out the style sported by actor Michael Pitt. Reminiscent of the sharp hairstyles favored by men in the early 20th century, this cut is characterized by hair that is significantly longer on the top than it is on the sides. To get this style, visit your barber and ask him to trim the hair on the crown of your head to a medium length and to remove weight from the sides of your head -- the more daring you are, the shorter the bottom layers can go. At home, comb all of your hair back with a touch of styling product and run your fingers through your hair to achieve the double slick. This hairstyle works best with straight hair.
Indie-Rock Front
Classic:

The cool, mod-ish look that has become synonymous with indie rock was highly influential in determining men’s hairstyles for 2012. Whether you love this genre or your musical tastes lie elsewhere, this hairstyle is incredibly easy to wear. A classic version of this cut, like the one worn by Lionel Messi, simply involves asking your barber to snip some piecey layers into your hair and then brushing the front forward before you leave for work.
Trendy Take:

Given that 2012’s indie rock hairstyle is largely about a full head of hair that women will want to run their hands through, your focus should be on choosing products that will help you get strong, shiny strands. For a hipper variant of the indie front, add a volumizing mousse to your hair-care routine to get some lift like Jimmy Fallon's, and then finger-style your hair for a purposefully undone look. This style lends itself beautifully to naturally wavy hair.
Short Buzz
Classic:

Last year, an ultra-defined buzz cut was the go-to hairstyle for black men. This year, the square-shaped cut remains the leading style for a good reason: It makes any man’s face appear more masculine, it’s easy to maintain and it’s sharp and sexy at the same time. Cam Newton and Drake have both recently been photographed sporting classic examples of this cut.
Trendy Take:

In 2011, the unique way to wear this cut was by incorporating asymmetrical designs. For 2012, however, trade the fancy hairstyling that no one will see unless they’ve got a bird's-eye view of your scalp in favor of stylish sides that will get everyone’s attention. You’ll notice Ludacris’ style, for instance, deviates from the perfectly square. Alternatively, shearing off most of your locks like Don Lemon is another fashion-forward way to wear this style.
Rockabilly
Classic:

Originally pioneered by musicians like Johnny Cash and Elvis, the ’50s pompadour is in the midst of a revival. As long as you go with a toned-down pomp, as seen in the Dolce & Gabbanna and Louis Vuitton Spring/Summer 2012 runway shows, this hairstyle works even in a conservative environment. Achieve a low-key pompadour by using mousse to coax only your front strands into standing up, then brush them slightly backward and to the side.
Trendy Take:

If you are employed in a creative field or it’s your day off from your suit-and-tie job, consider rocking a refined quiff, which was also showcased in a variety of major 2012 shows. Begin by working mousse throughout your entire head, and then have fun playing around. Just remember to keep the biggest lift in the front of your head and finish with a misting of hairspray to ensure your style stays put.
Messy curls
Classic:

It’s a fact that curly hair tends to have a mind of its own. The trick to working with this hair type is to get a great cut and then let your curls do their thing. In 2012, that means having your hair cut much shorter on the sides than on your crown. With buzz-cut sides and a peaked front, Oscar Pistorius’ ‘do is the gold standard for a classy, office-appropriate look. To keep everything polished, remember to use an anti-frizz product to control fly-aways.
Trendy Take:

Curly haired guys with an artsy side and a devil-may-care attitude will favor James Franco’s interpretation of this hairstyle, in which locks are still longer on top than on the sides but are overall longer everywhere. Another notable feature of this easygoing style is that while it may appear messy, curls are actually well defined, so you’ll need to throw a curl-controlling cream or shampoo into your grooming routine.
Chin-Length Layers
Classic:

Surf culture past and present has been a major theme in fashion as of late, with models being sent down runways sporting rash guards with blazers and long, natural hair. For a sleek option, model your hairstyle on Viggo Mortensen’s gradually layered locks. As you can see, medium to long layers can work well on straight hair regardless of your age, but what really counts here is a top-notch haircut that will air dry to perfection.
Trendy Take:

To wear chin-length layers in a very of-the-moment way, see Ashton Kutcher’s fresh take on the ’90s grunge-surfer look. The actor’s locks are only lightly layered and his part has a somewhat haphazard appearance that’s straight out of the '1990s. What keeps Kutcher’s hairstyle fresh, however, is its healthy (not greasy) shine. If you opt for this natural style, too, avoid scraggly locks by not making the mistake of skipping haircuts.
Short And Even
Classic:

An all-over short cut of a uniform length, as recently seen on Justin Timberlake, will emerge as one of 2012's favorite men’s hairstyles. In addition to being a wash-and-go style that’s ideal for active dudes, this look exudes clean-cut American charm that will pair well with the minimalist ensembles you’ll be seeing in stores throughout 2012.
Trendy Take:

Take the good-boy edge off this cut, as Michael Fassbender has done, by leaving your front just a little longer than the rest of your hair and using a smidge of wax to get a piece-y effect. This style is particularly recommended for men in the early stages of hair loss. Also, if you’ve got a rounder face or soft facial features, consider growing some scruffy facial hair to bring a strong, masculine vibe to this style.
Get the perfect Fathers Day Gift for your Dad by purchasing a Father's Day Haircut Deal with Jeffrey at Clark Russell the salon! For just $100.00 you get 4 haircuts with Jeffrey for the Fashionable Dad in your life! Must be purchased by Friday June 15th!
Friday, June 8, 2012
Veiling the Bride to be
There are many stories of the origin of a bride's veil. Some say that the veil was introduced in ancient Rome. People of that era believed that evil spirits would be attracted to the bride, so they covered her face with a veil in order to conceal her features and confuse them. The definition of veil is to "obscure, shroud, mask or cover, so perhaps that is how the bridal "veil" got its name.
It's also said the in medieval times, the veil was used to protect her from "the evil eye" and was a symbol of purity, chastity, and modesty.
Others say the the origin of the bridal veil was due to the circumstances of an arranged marriage. In days past, men bargained with an eligible young lady's father for their hand in marriage. AFTER the ceremony, the veil was lifted to reveal the brides features. This was to keep a groom from backing out of the deal if he didn't like what he saw.
Some say that the veil was used in days past as a symbol of a bride's submission and willingness to obey her husband.
Certain lengths of bridal veils got their names from how or where they were worn. At one time, Cathedral Veils were only worn in wedding that took place in cathedrals.
Well, times have changed the meaning of the tradition of wearing a bridal veil! Now, wearing a bridal veil:
•signifies a special event - A Wedding!
•signifies joy
•highlights the bride's appearance and features
•is the final crowning touch! Bridal Gowns are transformed with the addition of a veil.
The past history of wearing a bridal veil has given way to new traditions. Over the past 20 years, traditions surrounding the bridal veil have changed even more. Veils were worn more frequently over the face (a blusher). Now, you don't have to wear if over your face all all if you don't want to.
Brides of our day are making their own wedding veil history! Star Jones of the popular Television show "The View" wore a 27' FOOT long Veil--the longest known veil in history. It's dubbed the "Star Cathedral Veil". Her veil was two feet longer than Princess Diana's Bridal Veil.
It also used to be that brides marrying for the second time were not supposed to wear a veil, especially a white veil. Nowadays, it's perfectly acceptable to wear a veil (even a white one) for a second marriage if you want to! (Don't let anyone try to tell you different. It's YOUR day! If you want to wear it, go ahead!)
The wearing of a bridal gown and veil is one of the big days in a woman's life--Choose what YOU feel comfortable in and enjoy your special day! JUST DON"T OVER DO IT!
DO
-Wear a simple veil (i.e., single layer of tulle with either raw edge, pencil, or ribbon trim no wider than one inch) for an outdoor or daytime wedding.
-Opt for unique veils: a mantilla for a church or synagogue ceremony, to coordinate with and highlight the lace on your gown.
-Wear a cathedral veil at a traditional gown-and-church ceremony.
-Choose antique lace for a romantic, vintage feeling.
-A hat with netting works well with a City Hall white suit or cocktail dress.
-Keep with current trends and wear a veil lower in your hair.
-Wear a blusher for a traditional church ceremony.
DON’T
-Don heavy lace or embroidered veils at outdoor weddings.
-Wear the veil for the duration of the reception. Most brides take it off right after the ceremony, though some keep it on until the first dance.
-Have such a long, detailed, or complicated veil that it competes with the dress. Don’t go overboard with crystal trim, sequins, or embroideries.
-Fall victim to a crooked or messy veil. Put your maid of honor in charge of fluffing throughout the ceremony.
-Do tiaras unless they are very understated. Mikimoto makes simple pearl-and-diamond combinations.
-Wear a veil to your bachelorette party, please.
Try resources like www.theknot.com and "here comes the guide" for more advice!
Remember we are here for consultations and advice too, just book an appointment.
It's also said the in medieval times, the veil was used to protect her from "the evil eye" and was a symbol of purity, chastity, and modesty.
Others say the the origin of the bridal veil was due to the circumstances of an arranged marriage. In days past, men bargained with an eligible young lady's father for their hand in marriage. AFTER the ceremony, the veil was lifted to reveal the brides features. This was to keep a groom from backing out of the deal if he didn't like what he saw.
Some say that the veil was used in days past as a symbol of a bride's submission and willingness to obey her husband.
Certain lengths of bridal veils got their names from how or where they were worn. At one time, Cathedral Veils were only worn in wedding that took place in cathedrals.
Well, times have changed the meaning of the tradition of wearing a bridal veil! Now, wearing a bridal veil:
•signifies a special event - A Wedding!
•signifies joy
•highlights the bride's appearance and features
•is the final crowning touch! Bridal Gowns are transformed with the addition of a veil.
The past history of wearing a bridal veil has given way to new traditions. Over the past 20 years, traditions surrounding the bridal veil have changed even more. Veils were worn more frequently over the face (a blusher). Now, you don't have to wear if over your face all all if you don't want to.
Brides of our day are making their own wedding veil history! Star Jones of the popular Television show "The View" wore a 27' FOOT long Veil--the longest known veil in history. It's dubbed the "Star Cathedral Veil". Her veil was two feet longer than Princess Diana's Bridal Veil.
It also used to be that brides marrying for the second time were not supposed to wear a veil, especially a white veil. Nowadays, it's perfectly acceptable to wear a veil (even a white one) for a second marriage if you want to! (Don't let anyone try to tell you different. It's YOUR day! If you want to wear it, go ahead!)
The wearing of a bridal gown and veil is one of the big days in a woman's life--Choose what YOU feel comfortable in and enjoy your special day! JUST DON"T OVER DO IT!
DO
-Wear a simple veil (i.e., single layer of tulle with either raw edge, pencil, or ribbon trim no wider than one inch) for an outdoor or daytime wedding.
-Opt for unique veils: a mantilla for a church or synagogue ceremony, to coordinate with and highlight the lace on your gown.
-Wear a cathedral veil at a traditional gown-and-church ceremony.
-Choose antique lace for a romantic, vintage feeling.
-A hat with netting works well with a City Hall white suit or cocktail dress.
-Keep with current trends and wear a veil lower in your hair.
-Wear a blusher for a traditional church ceremony.
DON’T
-Don heavy lace or embroidered veils at outdoor weddings.
-Wear the veil for the duration of the reception. Most brides take it off right after the ceremony, though some keep it on until the first dance.
-Have such a long, detailed, or complicated veil that it competes with the dress. Don’t go overboard with crystal trim, sequins, or embroideries.
-Fall victim to a crooked or messy veil. Put your maid of honor in charge of fluffing throughout the ceremony.
-Do tiaras unless they are very understated. Mikimoto makes simple pearl-and-diamond combinations.
-Wear a veil to your bachelorette party, please.
Try resources like www.theknot.com and "here comes the guide" for more advice!
Remember we are here for consultations and advice too, just book an appointment.
Accessoring your Wedding- What to do and what not to do
Accessories can pull together a look or make you get odd looks if you go a little overboard. Unless your a part of the Gypsy clan, and those of you who watch My Big Fat Gypsy Wedding know what we are talking about, you may want to consider something that is classic rather then overly trendy.
Bridal Extensions
It is your dream day and you want your dream hair. Extensions are a great for adding a little bit of weight and volume to your hair without making you look like a completely different personm, if you style them correctly that is.
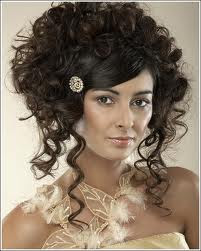
Adding volume and texture for updos can be easy with the use of extensions. Clip in's are affordable and you can always used them after the wedding. You don't want to go over board with the volume though
Great example of how to wear extenions in an updo
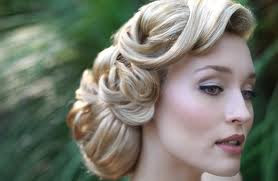
A Great example of how not to wear extensions in an updo
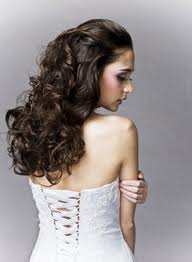
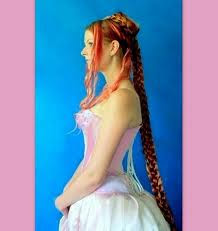
Adding fullness and length by wearing extenions is also great for wedding styles. You Don't want to go overboad with the length and end up with an odd style though. The hair should match your color and texture and compliment your look, not put all the focus on obsurdly long hair.
A great exmaple of how to wear extenions for a down bridal look
A Great exampe of how not to wear extenions for length
Adding Flowers,Hair Accessories and the fower girl
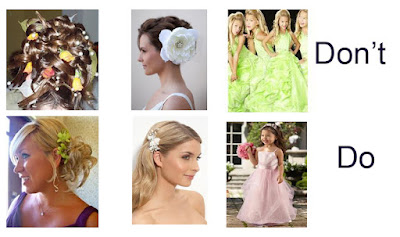
Adding some decorative pieces to your hair can add or take away from your look as a bride. You don't want to add pieces that will make you look like a walking satelite dish, so blingy that you can flag down an aircraft or have so many flowers you look like a walking garden. The idea is to draw attention to your face, not take away from it. You also want to keep your flower girls looking age appropriate, not like part of a pageant.
Check back on tomorrows blog when we break down the veil...
Bridal Extensions
It is your dream day and you want your dream hair. Extensions are a great for adding a little bit of weight and volume to your hair without making you look like a completely different personm, if you style them correctly that is.
Adding volume and texture for updos can be easy with the use of extensions. Clip in's are affordable and you can always used them after the wedding. You don't want to go over board with the volume though
Great example of how to wear extenions in an updo

A Great example of how not to wear extensions in an updo

Adding fullness and length by wearing extenions is also great for wedding styles. You Don't want to go overboad with the length and end up with an odd style though. The hair should match your color and texture and compliment your look, not put all the focus on obsurdly long hair.
A great exmaple of how to wear extenions for a down bridal look

A Great exampe of how not to wear extenions for length

Adding Flowers,Hair Accessories and the fower girl
Adding some decorative pieces to your hair can add or take away from your look as a bride. You don't want to add pieces that will make you look like a walking satelite dish, so blingy that you can flag down an aircraft or have so many flowers you look like a walking garden. The idea is to draw attention to your face, not take away from it. You also want to keep your flower girls looking age appropriate, not like part of a pageant.

Check back on tomorrows blog when we break down the veil...
Thursday, June 7, 2012
Fish Scale Lipstick and the perfect pucker for the wedding
Did you know that most lipsticks contain fish scales... Not a great throught when choosing a lipstick for your wedding day but we will explain this. The ingredient under discussion is called pearl essence. (Some sources give this as "pearlescence.") It's the silvery stuff found in fish scales that's used in some lipsticks, nail polishes, ceramic glazes, etc., to make them shimmery. Pearl essence is obtained primarily from herring and is one of many by-products of large-scale commercial fish processing. Synthetic versions have been developed, but to what extent they've supplanted the natural variety I hesitate to say. The cosmetics companies were not forthcoming and I got contrary stories from different industry observers. Fishermen still collect the stuff, though, and one presumes it's being put to good use.
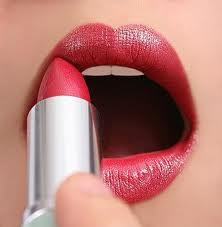
Now on to How to acheive the perfect looks for your kissable wedding day lips:
Lip makeup plays a crucial role in all the makeup process, as if it is not done properly it can ruin your entire appearance by making you look ridiculous. When it comes to lip makeup there are a few tips and tricks in order to choose the right lipstick color or redefine their shape and make them look thinner or fuller according to the result you are searching for.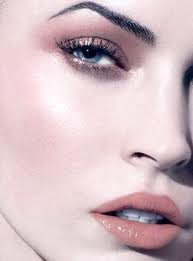
Whenever talking about lip makeup, there is one important and essential principle. Lip makeup has to be lighter if you have emphasized your eyes. In this case a lip gloss would do. On the other hand, if you want to bet everything on your lips, here are some useful tips.
•First, choose a lipstick color that suits you. For this, the draping step cannot be ignored. However, rules say that dark-haired women should go for red or maroon shades, blondes should choose lighter colors in pink hues, while for red-haired the best option is orange.
•Women having thinner lips should avoid dark red lipsticks that will only make their lips look even thinner than they really are. Dark colors are known as volume reducers, that's why women with thin lips should go for fair colors.
If you want to make them look thicker, pick a lip liner close to the color of your lipstick and make an outline outside your natural lip. Also, a shimmery lip gloss can add plumpness to your lips. Apply the lip gloss on lipstick or alone. Therefore, you should avoid lip gloss if you have thicker lips. Lipsticks can be matte, glossy, creamy or frost. You should know that a shimmery lipstick is better than a matte one as it makes your lips look fuller.
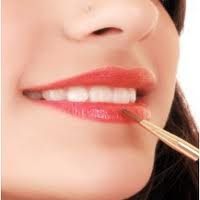
•If your lips are too thin or too fleshy, a good makeup could give the illusion of magnifying or diminishing you lips' size. For this, you need foundation, a lip balm, a lip liner, a lipstick and a gloss. Start by smoothing out the lip contour using foundation.
Afterwards, it will be much easier to redraw the contours of your lips, going beyond your natural contour if you have thinner lips, or on the contrary, making an outline inside the natural lip line if your lips are fuller. In both cases start in the middle point of your lips and go towards the corners of the lips. For thin lips, apply some lip gloss in the middle of the lower lip for thickness effect.
•If your upper lip is narrow, choose two lipstick colors, a darker and a lighter one. Apply the darker one on the lower lip, and use the lighter one for the upper lip. You can also apply a lip liner but only on the upper lip, and try to pick a shade that is close to the one of your lipstick. If your lower lip is narrow apply the same trick but doing everything upside-down.

•For shapeless lips, use a lip liner and make a "V" so you define the bow area going beyond your natural lip line, and then draw more curved lines to the corners of the mouth. It is preferable to apply lipstick using a lip brush.
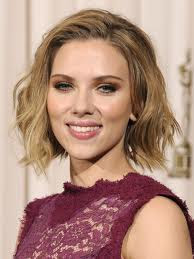
•Lip makeup for mature women. It is a normal thing that as the years pass by the color and the shape of a mature woman to change. A lip liner is the answer in order to keep the lipstick from bleeding. Choose one that is close to your natural skin color. You can also put on a lip gloss over your lipstick so your lips to look fuller. Avoid matte or glossy and go for creamy lipsticks.

More Tips
•You should never use a darker liner with a light lipstick.
•Women having full lips should avoid glossy lip colors and they don't really need any lip liner.
•Don't apply a thick coat of lip gloss over the lipstick. Apply it instead in the center of the lips and even it starting from there.
•If you want to make your lipstick long-lasting, you should apply two coats of lipstick. After the first coat, press the lips on a tissue paper and then apply the other coat.
•If you want to hide yellow teeth, lipstick with blue undertones such as plum, pink, or violets.
•Use special lip creams with vitamins A, E or C so you can boost the amount of collagen in your lips.

Now on to How to acheive the perfect looks for your kissable wedding day lips:
Lip makeup plays a crucial role in all the makeup process, as if it is not done properly it can ruin your entire appearance by making you look ridiculous. When it comes to lip makeup there are a few tips and tricks in order to choose the right lipstick color or redefine their shape and make them look thinner or fuller according to the result you are searching for.

Whenever talking about lip makeup, there is one important and essential principle. Lip makeup has to be lighter if you have emphasized your eyes. In this case a lip gloss would do. On the other hand, if you want to bet everything on your lips, here are some useful tips.
•First, choose a lipstick color that suits you. For this, the draping step cannot be ignored. However, rules say that dark-haired women should go for red or maroon shades, blondes should choose lighter colors in pink hues, while for red-haired the best option is orange.
•Women having thinner lips should avoid dark red lipsticks that will only make their lips look even thinner than they really are. Dark colors are known as volume reducers, that's why women with thin lips should go for fair colors.
If you want to make them look thicker, pick a lip liner close to the color of your lipstick and make an outline outside your natural lip. Also, a shimmery lip gloss can add plumpness to your lips. Apply the lip gloss on lipstick or alone. Therefore, you should avoid lip gloss if you have thicker lips. Lipsticks can be matte, glossy, creamy or frost. You should know that a shimmery lipstick is better than a matte one as it makes your lips look fuller.

•If your lips are too thin or too fleshy, a good makeup could give the illusion of magnifying or diminishing you lips' size. For this, you need foundation, a lip balm, a lip liner, a lipstick and a gloss. Start by smoothing out the lip contour using foundation.
Afterwards, it will be much easier to redraw the contours of your lips, going beyond your natural contour if you have thinner lips, or on the contrary, making an outline inside the natural lip line if your lips are fuller. In both cases start in the middle point of your lips and go towards the corners of the lips. For thin lips, apply some lip gloss in the middle of the lower lip for thickness effect.
•If your upper lip is narrow, choose two lipstick colors, a darker and a lighter one. Apply the darker one on the lower lip, and use the lighter one for the upper lip. You can also apply a lip liner but only on the upper lip, and try to pick a shade that is close to the one of your lipstick. If your lower lip is narrow apply the same trick but doing everything upside-down.

•For shapeless lips, use a lip liner and make a "V" so you define the bow area going beyond your natural lip line, and then draw more curved lines to the corners of the mouth. It is preferable to apply lipstick using a lip brush.

•Lip makeup for mature women. It is a normal thing that as the years pass by the color and the shape of a mature woman to change. A lip liner is the answer in order to keep the lipstick from bleeding. Choose one that is close to your natural skin color. You can also put on a lip gloss over your lipstick so your lips to look fuller. Avoid matte or glossy and go for creamy lipsticks.

More Tips
•You should never use a darker liner with a light lipstick.
•Women having full lips should avoid glossy lip colors and they don't really need any lip liner.
•Don't apply a thick coat of lip gloss over the lipstick. Apply it instead in the center of the lips and even it starting from there.
•If you want to make your lipstick long-lasting, you should apply two coats of lipstick. After the first coat, press the lips on a tissue paper and then apply the other coat.
•If you want to hide yellow teeth, lipstick with blue undertones such as plum, pink, or violets.
•Use special lip creams with vitamins A, E or C so you can boost the amount of collagen in your lips.
Tuesday, June 5, 2012
Top Ten Wedding Hair & Make-up Mistakes
When getting ready for the big day many brides make the mistake of over doing the hair and make-up or under doing the hair and make-up. You want to be able to look back on photos years to come and not say to yourself what the hell was I thinking.We cam eup with the top ten lists of Wedding hair and make-up mistakes to avoid.
10.Too Much Make-up and Too Much Products
You want to stay away from overly heavy make-up and hair that won't move. On your wedding day less if more. You don't wnat to walk down the isle looking like a las vegas show girl.

9.Stuck on Trends
You want to stay away from trends crazy and colorful trnds. Bright colorful make-up, over exagerated updos, over the top braids ext. Unless your a gypsy that is...

8.Stay True to You
Go with a style that represents who you are, not what you want to prove to people. In otherwards you don't want to go with an over the top high fashion look if you are a simple girl. Or make it a whole production. Remember why you are there to get married.

7.Look Alikes
You don't the wedding party to be confused on who is actually getting married. The bridal party should look different from the bride. An understated different. If the bride in going simple, the bridal party shold be even more simple.

6.Forcing the Unwilling
Try not to over do a bridal party look with someone who isn't comfortable dressing up and getting dolled up. With these friends and fmily, simple is better. Let their personality show.

5.Change is good, just not before your wedding
Don’t try to tackle too many changes and repairs just before your wedding day. One week before the big event is not the ideal time to try a new hair color, get peels, teeth whitening, or different types of tans. You may end up with color you hate, acne flair-ups, sore gums or blotchy tan marks.

4.Don't Over shine your hair or over gloss your lips
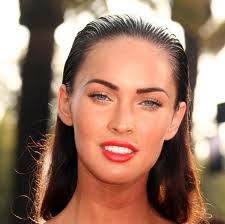
The last thing you want on yur wedding day it to look greasy and over gloss your lips. You want to avoid looking greasy on camera.
3. Don't Overshine

Many brides want a “dewey” shining cheek. Careful because it can look super oily in photos. Opt with a small bit of highlighting on cheekbones or eyes, but not your entire face. This is the time to ditch the mineral makeup look as well - shimmer is not your friend for pictures. Pro brands are your friend and a professional makeup artist will know these particular brands (not retail, generally).
2.Un Touch-Able
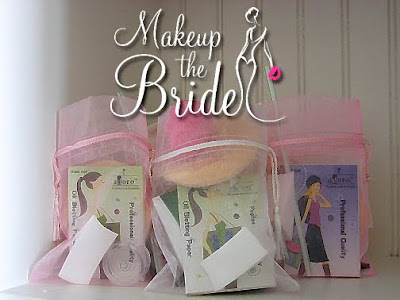
Any great makeup artist will tell you that you do need a touch up or two. You will need blotting papers or powder to control face shine before photos, lipstick to reapply. Have a designated "beauty helper" to keep an eye out for you if they see you may need a little something and touch up.
1.Don't Forget your Stylist

We get a lot of last minute, frantic wedding day makeup inquiries. Please look at least 6 months ahead or so to find and book your wedding makeup artist and hairstylists - if you're spending a small fortune on wedding photos - do hire a professional to be a part of your "team". Compared to florals - which don't last past the week (don't get me wrong, florists are essential too) - your makeup and hair will be showcased in your photos for life. Just a consideration. :)
Clark Russsell Salon offers great packages for brides and bridal parties. Call ahead though.... we book up fast!
Check back on the next blog when we talk about adding extensions and hair accessories to your look!
10.Too Much Make-up and Too Much Products
You want to stay away from overly heavy make-up and hair that won't move. On your wedding day less if more. You don't wnat to walk down the isle looking like a las vegas show girl.

9.Stuck on Trends
You want to stay away from trends crazy and colorful trnds. Bright colorful make-up, over exagerated updos, over the top braids ext. Unless your a gypsy that is...

8.Stay True to You
Go with a style that represents who you are, not what you want to prove to people. In otherwards you don't want to go with an over the top high fashion look if you are a simple girl. Or make it a whole production. Remember why you are there to get married.

7.Look Alikes
You don't the wedding party to be confused on who is actually getting married. The bridal party should look different from the bride. An understated different. If the bride in going simple, the bridal party shold be even more simple.

6.Forcing the Unwilling
Try not to over do a bridal party look with someone who isn't comfortable dressing up and getting dolled up. With these friends and fmily, simple is better. Let their personality show.

5.Change is good, just not before your wedding
Don’t try to tackle too many changes and repairs just before your wedding day. One week before the big event is not the ideal time to try a new hair color, get peels, teeth whitening, or different types of tans. You may end up with color you hate, acne flair-ups, sore gums or blotchy tan marks.

4.Don't Over shine your hair or over gloss your lips

The last thing you want on yur wedding day it to look greasy and over gloss your lips. You want to avoid looking greasy on camera.
3. Don't Overshine

Many brides want a “dewey” shining cheek. Careful because it can look super oily in photos. Opt with a small bit of highlighting on cheekbones or eyes, but not your entire face. This is the time to ditch the mineral makeup look as well - shimmer is not your friend for pictures. Pro brands are your friend and a professional makeup artist will know these particular brands (not retail, generally).
2.Un Touch-Able

Any great makeup artist will tell you that you do need a touch up or two. You will need blotting papers or powder to control face shine before photos, lipstick to reapply. Have a designated "beauty helper" to keep an eye out for you if they see you may need a little something and touch up.
1.Don't Forget your Stylist

We get a lot of last minute, frantic wedding day makeup inquiries. Please look at least 6 months ahead or so to find and book your wedding makeup artist and hairstylists - if you're spending a small fortune on wedding photos - do hire a professional to be a part of your "team". Compared to florals - which don't last past the week (don't get me wrong, florists are essential too) - your makeup and hair will be showcased in your photos for life. Just a consideration. :)
Clark Russsell Salon offers great packages for brides and bridal parties. Call ahead though.... we book up fast!
Check back on the next blog when we talk about adding extensions and hair accessories to your look!
Subscribe to:
Posts (Atom)